Forget the neon-bright vinegar kits that usually end up staining your kitchen counters every Easter.
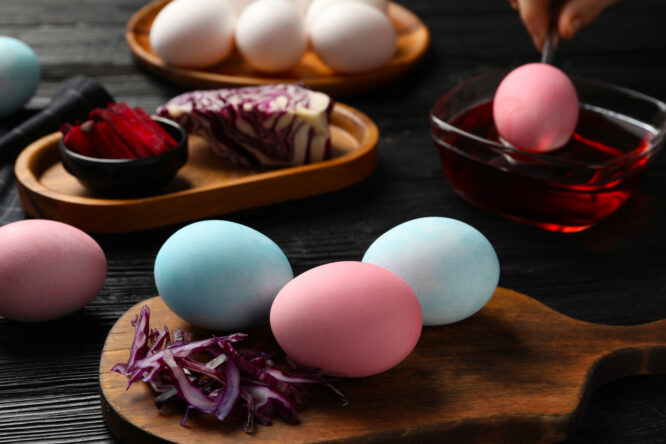
People are now chucking a head of red cabbage into a pot and getting a range of deep, mottled blues that look more like expensive stoneware than a supermarket egg. It’s a bit of a weird one because you’d expect a pink or purple finish, but a quick soak in the leftover cooking water triggers a reaction that turns the shells into something much more interesting.
This is one of those rare DIY trends that actually looks better in person than it does in a filtered photo, and you probably have everything you need in the vegetable drawer already. Here’s what you need to know about this decorative practice, and whether or not it’s worth trying yourself.
What actually happens when you dye eggs with red cabbage?
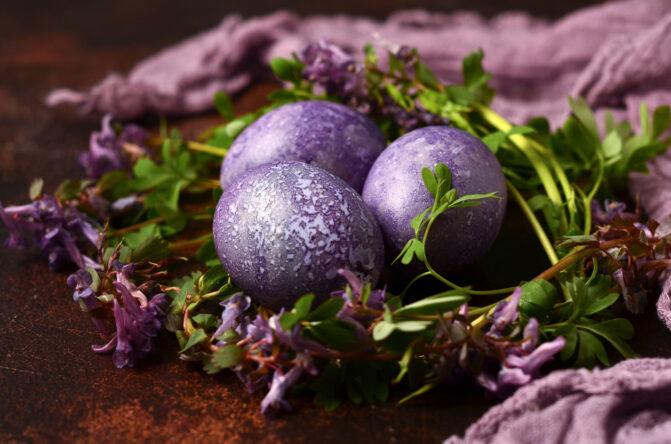
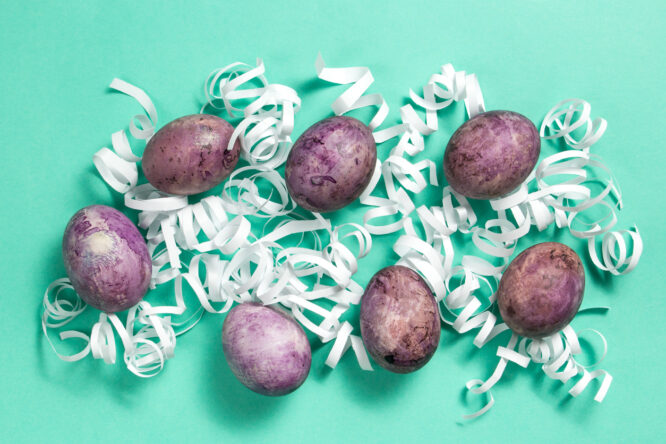
Red cabbage contains a pigment called anthocyanin, which is the same compound that gives red cabbage its deep purple colour. When you boil it in water, it releases that pigment into the liquid and turns it a dark purplish-blue. What surprises most people is that the eggs don’t come out purple at all—they come out blue.
It’s usually a soft, dusty, natural blue that looks like something you’d pay a lot of money for at a craft shop. However, the exact shade depends on how long the eggs sit in the dye, and that’s where it gets interesting because one batch of dye can give you a whole spectrum from pale sky blue right through to deep indigo, just by adjusting the soaking time.
Why are people switching from shop-bought dye kits?
The standard Easter egg dye kit has been around forever. You drop a tablet into vinegar and water, it fizzes, and you get a fairly artificial-looking result that fades quickly and smells a bit odd. The cabbage method produces colours that look genuinely elegant rather than garish, and because each egg absorbs the dye slightly differently, you never get two that look exactly the same.
The unpredictability is actually one of the best things about it. There’s also the fact that the eggs are perfectly safe to eat afterwards since nothing unnatural has gone near them, which matters if you’re doing this with kids who are inevitably going to try to peel one the second it comes out of the dye.
What you need

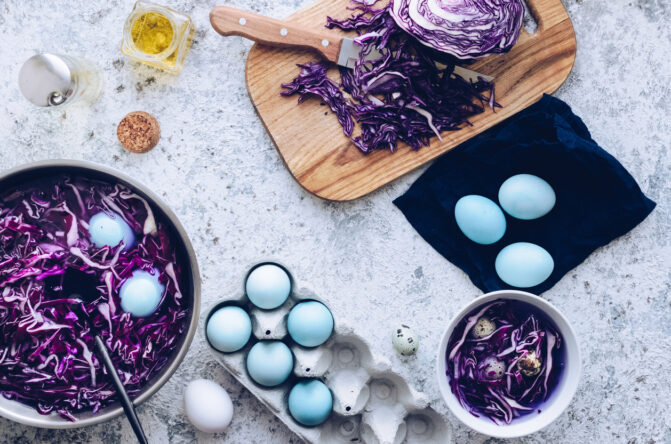
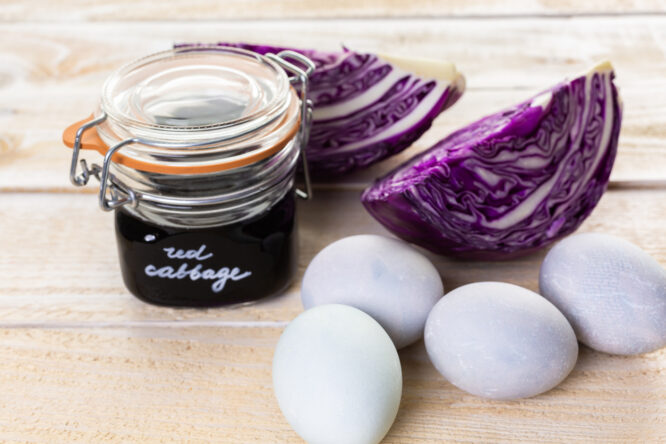
You don’t need much. Around half a red cabbage chopped into rough pieces, five or six cups of water, white vinegar, and hard-boiled eggs. White eggs show the colour most vividly, though brown eggs work too and give a slightly more muted, earthy result. That’s genuinely it. Everything else is optional and comes down to how decorative you want to get with the finished eggs.
How to make the dye
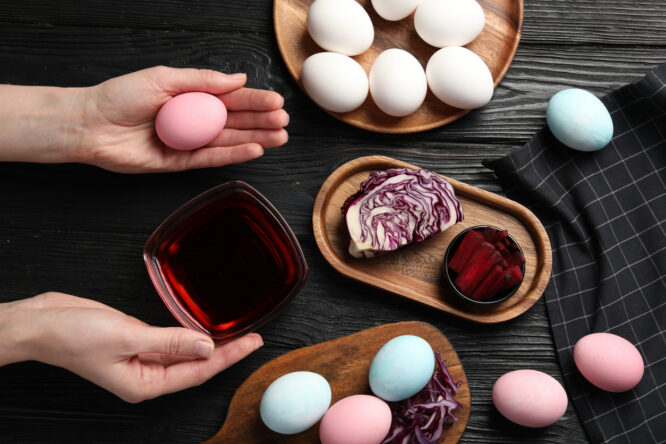
Put the chopped cabbage in a large saucepan and cover it with water. Bring it to the boil and then reduce to a simmer for around 25 to 30 minutes. The water will turn a deep purple. Once it’s done, take it off the heat and let it cool. Strain out all the cabbage pieces so you’re left with just the liquid. Then add one tablespoon of white vinegar for every cup of dye.
The vinegar helps the colour bind to the eggshell, which is why it’s worth not skipping. Pour the finished dye into a wide jar or bowl that’s big enough to submerge the eggs.
How long should the eggs sit in the dye?
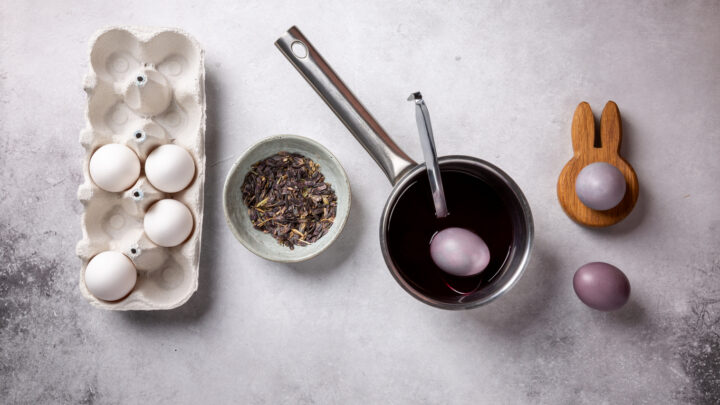
This is where you have complete control over the results. Around 30 minutes gives you a very pale, almost silvery blue. Three to four hours produces a proper mid-blue that looks lovely in a bowl or nest. Leave them overnight in the fridge and you’ll get something close to deep indigo, which is genuinely stunning. Most people do a mix of timings to get variety across a whole batch.
Keep the eggs submerged in the fridge while they’re soaking rather than leaving them out, both for food safety and because the cold slows the process down slightly, which makes it easier to control the shade.
How to get different shades and effects
The basic method gives you blues, but you can push the results further with a couple of kitchen ingredients. Adding a small amount of baking soda to the dye changes the pH and nudges the colour towards a more greenish-blue. Adding extra vinegar pulls it towards a slightly warmer, more violet tone. Neither change is major, but it’s worth experimenting if you want a broader range of colours from a single batch of dye.
You can also press leaves or herbs flat against the egg before dyeing to create botanical patterns. Lay a small leaf smooth-side down against the egg, wrap it tightly in a piece of cut-up old tights to hold it in place, and then submerge the whole thing in the dye. When you remove the tights and peel off the leaf, there will be a silhouette in the original egg colour against the blue background. Carrot tops work well for this, as do flat parsley leaves, fern fronds, or any herb with an interesting shape.
What to do with them once they’re done
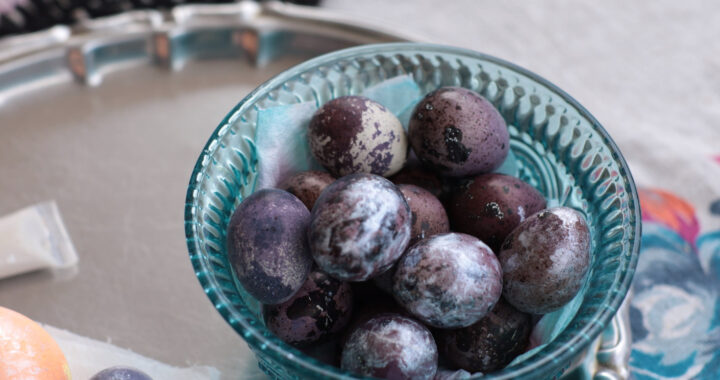
Remove the eggs from the dye and place them on a wire rack or a sheet of baking paper to dry. Don’t be tempted to pat them aggressively with a cloth because the dye can come off while it’s still wet. Once they’re fully dry, you can rub a tiny drop of vegetable oil over each one with your fingers to bring up a slight sheen and deepen the colour a little. It also helps them look finished rather than chalky.
They look beautiful displayed simply in a bowl or arranged in a nest of dried moss or shredded paper. Because the colour palette is naturally cool and muted, they work well with neutral Easter decorations, dried flowers, or anything in natural materials rather than bright plastic.
Can you do other colours with the same method?
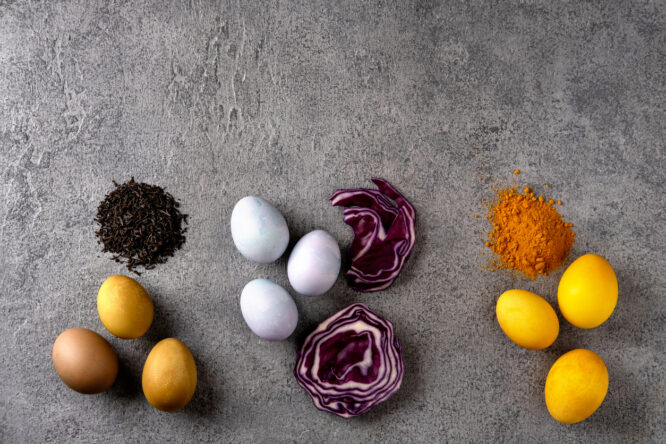
Red cabbage is the one that tends to get people most excited because the blue is so unexpected and pretty. But the same basic method works with other kitchen ingredients to build out a whole colour palette. Turmeric gives a strong golden yellow. Beetroot produces a dusky pink to mauve. Brown or white onion skins create shades of orange and rust. Coffee gives a warm tan. Using a few different dye baths alongside your cabbage batch means you can end up with a whole collection that looks genuinely considered rather than thrown together.
Is it worth the effort?
Boiling cabbage does smell. That’s the honest answer. It’s not a scent you’d want to bottle and sell. But the process takes less than an hour from start to finish, the ingredients cost almost nothing, and the results are the kind of thing people ask about when they see them on your table. For an Easter tradition that involves the whole family, costs very little, produces zero synthetic chemicals, and gives you eggs you’ll actually want to display rather than hide in a drawer, it’s hard to find a reason not to try it at least once.