Most people buy an air fryer, discover it does brilliant chips and crispy chicken, and then just stop there.
That’s understandable, but there’s quite a bit more you can squeeze out of it once you know how. These are tips from people who use theirs regularly, so they’re practical rather than the kind of thing that sounds good in theory but never quite works at home. Cooking times vary depending on your model, so treat these as starting points and adjust as you go. After all, a bit of trial and error is part of it.
Jacket potatoes get a proper crispy skin with this two-step trick.

Here’s the thing about jacket potatoes: doing them entirely in the air fryer takes forever, and doing them entirely in the microwave gives you soft skin that never quite satisfies. The fix is to do most of the cooking in the microwave first, then transfer the potato to the air fryer at around 175 °C with a brush of oil for the last few minutes. You get the speed of the microwave and the crispy skin of the air fryer, and the whole thing takes a fraction of the time it normally would. Once you’ve tried it this way, it’s hard to go back to choosing one or the other.
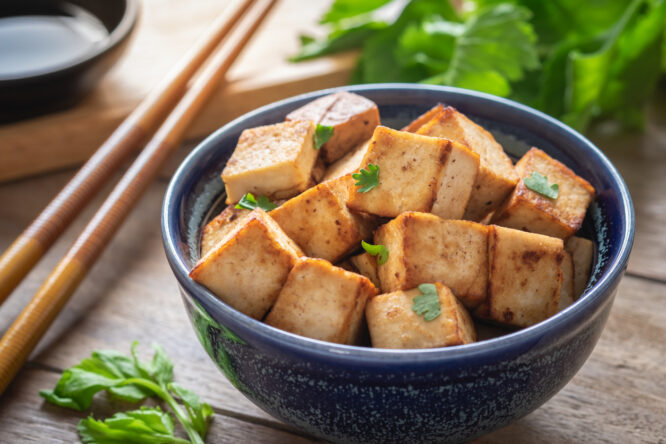
Tofu actually gets crispy in an air fryer, which changes everything.

If you’ve spent time trying to get tofu properly crispy in a frying pan, you’ll know how hit-and-miss it can be. The air fryer sorts this out. Cut it into cubes or tear it into chunks, coat in cornflour and whatever seasoning you fancy, add a little oil, and cook at 200 °C for about 10 minutes. The outside gets nice and crispy and the texture ends up almost chicken-like, which makes it much easier to win people over with it. It works really well thrown into a stir-fry, or just eaten as it is with a dipping sauce on the side.
Toasted sandwiches come out brilliantly without standing over anything.

Butter the outside of the bread so it crisps up properly, add your filling, and cook at around 180 °C for six to eight minutes, turning halfway through. Grated cheddar melts better than sliced, though brie with a bit of tomato is worth trying. For something a bit more interesting, spread the inside with crème fraîche, add grated emmenthal and a slice of ham, and you’ve basically got a croque monsieur without needing to turn the hob on. It’s quicker than a frying pan, you’re not standing over it, and the kitchen stays a lot cleaner.
You can make bacon without the splatter or the lingering smell.

Frying bacon on the hob leaves everything smelling for hours. The air fryer doesn’t do that, and you’re not stuck watching it the whole time either. Set it to around 200° C and start checking after a couple of minutes, or just one minute if you’re only doing a rasher or two. The thickness of the bacon and how cold it was when it went in both affect how long it needs, so checking regularly beats setting a timer and hoping for the best. Give the rashers space in the basket too. Cramming them in means they steam rather than crisp, which defeats the whole point.
Toasting nuts is so much easier than doing it in the oven.

If you’ve ever burnt a tray of nuts in the oven, you’ll know that horrible moment when you realise you’ve gone from nearly there to overdone in about 30 seconds. The air fryer is more forgiving because the heat circulates evenly, so you get a consistent golden colour rather than some burnt and some barely touched. Toast them at around 160 °C for three to eight minutes, shake the basket halfway through, and pull them out when they smell toasty and look lightly golden. They carry on cooking slightly from the heat once they’re out, so taking them out just before they look done is a smart move.
Eggs work in there too, and they come out really well.

Set your air fryer to around 150 °C on a bake or roast setting, and a large egg takes about nine minutes for soft and eleven for hard. No boiling water, no shells cracking when they hit the pot, and you’re not standing over the hob while everything else gets cold. It’s particularly handy when you’re making a full breakfast and your attention is being pulled in several directions at once. It’s worth noting that some models just don’t take to eggs this way, so it might need a bit of experimenting before you land on the right time for yours.
Corn on the cob is one of the best things to make in it.

It’s quick, it barely needs any oil, and the result is juicy and tender without much effort at all. Put the cobs in a single layer, cook at around 1190 °C for 10 to 12 minutes, and shake the basket a few times while it’s going. While they’re cooking, mix a pinch of chilli flakes or smoked paprika into some softened butter and brush it on as soon as they come out. It sounds like a small thing, but it makes them taste considerably better. Smaller supermarket cobs tend to work better than larger ones, partly because they fit in the basket more easily.
Cleaning is much less of a chore with two simple things.

A piece of foil under the food before cooking catches drips and stops things sticking far more effectively than spray oil. It means the basket needs barely any cleaning afterwards, which adds up over time. Silicone trays that fit inside the basket are also worth picking up. Food doesn’t get stuck in the grid, and the tray just goes straight in the dishwasher. Neither of these costs much, but both make the whole experience considerably less annoying to maintain.